
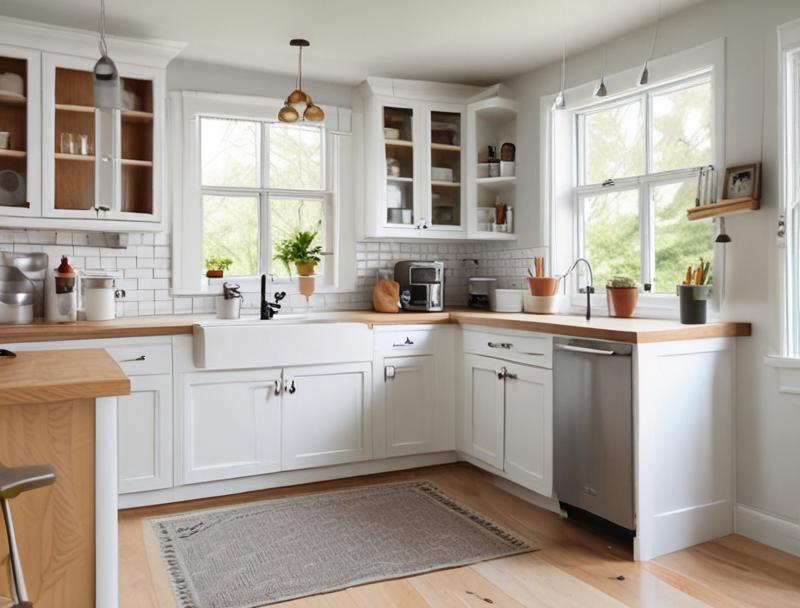
Learning how to replace kitchen cabinet doors is a practical skill that can save you money, refresh your kitchen’s look, and fix damaged or outdated hardware. Whether you’re swapping out old doors for new ones or just replacing hinges, this guide covers every step-from measuring and removing doors to installing custom or pre-fabricated replacements. You’ll learn tools needed, common mistakes to avoid, and troubleshooting tips so your cabinets fit perfectly and function smoothly.
Ready to tackle the project? Let’s get started!
Why Replace Kitchen Cabinet Doors?
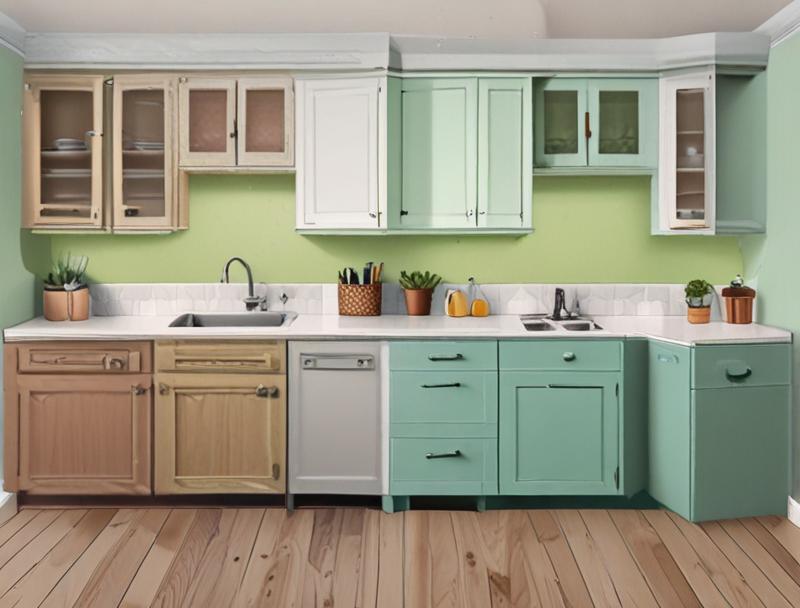
Replacing kitchen cabinet doors offers several benefits beyond just updating aesthetics. First, it’s often faster and less expensive than rebuilding entire cabinets, especially if only the doors are worn or damaged. Second, modern designs like shaker, flat-panel, or frameless doors instantly elevate a kitchen’s style without major renovations.
Third, proper replacement improves functionality: misaligned doors cause gaps or jamming, but correctly fitted ones ensure smooth operation and better storage access.
- Cost-Effective: A full cabinet rebuild costs $500-$1,500 per unit; door-only replacement averages $100-$400 per set.
- Style Refresh: Swap traditional oak doors for sleek white lacquer or reclaimed wood for instant transformation.
- Durability Boost: New doors resist moisture, scratches, and dents, extending cabinet life by 10-15 years.
- Easier DIY: With basic tools (screwdriver, level, measuring tape), most homeowners complete the job in under 8 hours.
For example, a homeowner in Portland
Gathering Tools and Materials

A successful door
| Tool/Material | Purpose | Estimated Cost | Alternative Option |
|---|---|---|---|
| Screwdriver (flathead/phillips) | Remove old hinges and secure new doors | $10-$20 | Power drill with screwdriver bit ($40) |
| Measuring tape | Record cabinet dimensions precisely | $5-$15 | Smartphone app (free) |
| Level | Ensure door alignment during installation | $15-$30 | Laser level ($60+) |
| Hinge pins | Secure door attachment points | $2-$5 each | Pre-assembled hinge kits ($15/set) |
| Sandpaper (medium/fine grit) | Smooth edges on new or repurposed doors | $8-$15 | Electric sander ($50+) |
- Pro Tip: Purchase hinges slightly longer than needed; trimming excess avoids stress on screws.
- Material Options: Choose solid wood for durability, MDF for affordability, or composite for moisture resistance.
- Paint Prep: If painting new doors, use a primer designed for cabinets (e.g., Kilz) for adhesion.
Measuring Your Cabinets Accurately
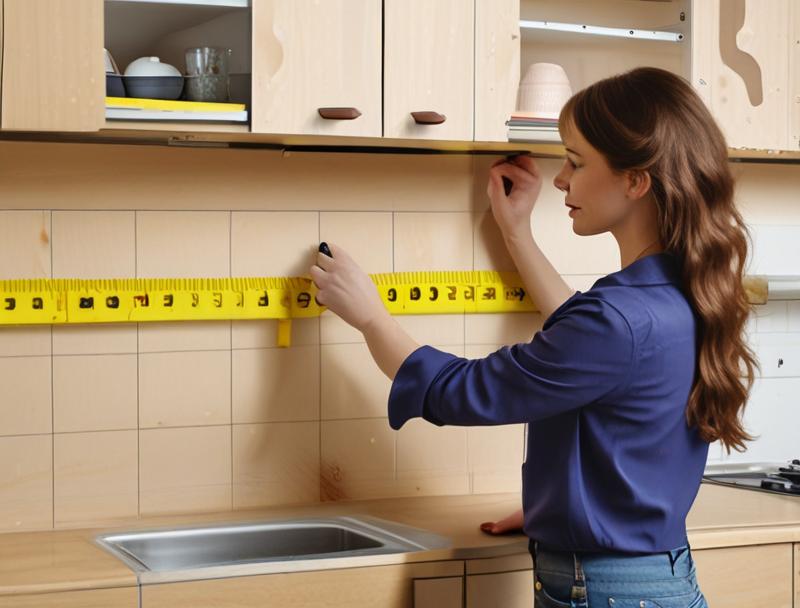
Incorrect measurements lead to ill-fitting doors, wasted materials, and costly returns. Follow this step-by-step process:
- Measure Height: Measure from the top of the cabinet frame to the bottom, noting variations between sides (e.g., 36″ left vs. 35.5″ right).
- Measure Width: Record the space between adjacent cabinet frames at three heights (top, middle, bottom) to account for depth differences.
- Check Depth: Measure from the cabinet face to the back wall, including any overhangs or toe kicks.
- Note Hinge Placement: Mark existing hinge positions with pencil lines; reuse them unless upgrading to different hinges.
For instance, a homeowner in Chicago found their upper cabinets had uneven widths due to a sloped ceiling, requiring custom-cut doors instead of standard sizes. Always double-check with multiple tape passes-human error adds up!
Common Measurement Mistakes
- Oversights: Forgetting to measure for crown molding or baseboard height adjustments.
- Inconsistent Tools: Using a stretched tape measure leads to false precision claims.
- Rushing: Assuming all doors match without checking individual cabinet profiles.
Removing Old Cabinet Doors
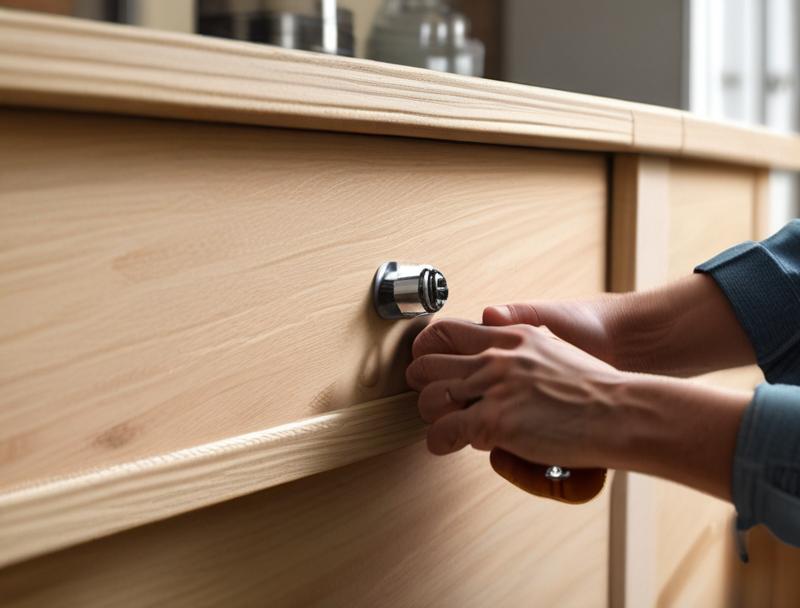
Old doors may be secured tightly or have hidden fasteners. Here’s how to remove them safely:
- Locate Hinges: Most cabinets use European-style (hidden) or traditional (exposed) hinges.
- Loosen Screws: Turn counterclockwise until doors detach; support them to prevent dropping.
- Handle Hidden Fasteners: Some cabinets require prying off small plastic clips or pulling out dowels.
Case Study: A homeowner in Seattle used a rubber mallet to gently tap stubborn hinge pins into place before removing them, avoiding damage to cabinet frames. Always work slowly-rushing cracks wood or strips paint.
Dealing with Stuck Doors
- Warm Water Trick: Soak hinges in warm water for 10 minutes to loosen dried glue.
- Spray Lubricant: WD-40 works well on rusted or stuck hinges; wipe after disassembly.
- Soft Clamp: Place a padded clamp around the door to even pressure during removal.
Choosing New Cabinet Doors
Selecting doors depends on budget, style preferences, and cabinet structure:
- Material Types:
- Solid Wood: Durable and classic, but heavy; requires precise cutting.
- MDF: Lightweight and affordable; ideal for painted finishes.
- Composite: Resists moisture, good for kitchens near sinks.
- Door Styles:
- Shaker: Traditional raised panels, great for rustic or transitional looks.
- Flat-Panel: Sleek and modern; often paired with full overlay frames.
- Frameless: No face frame, maximizes storage space.
- Finish Options:
- Paint: Offers endless color choices; requires sealing for longevity.
- Varnish/Lacquer: Adds shine; needs regular maintenance.
- Stain: Enhures grain visibility; best for natural woods.
Statistic: According to HomeAdvisor, 73% of homeowners opt for painted doors for their versatility in matching other room elements. A Texas-based contractor saved clients an average of $1,200 by recommending pre-fabricated doors versus custom millwork.
Cutting and Preparing New Doors
Most pre-made doors come in standard sizes, but adjustments may still be needed:
- Verify Measurements: Compare against your notes; mark cut lines with a pencil.
- Use a Jigsaw or Router: For straight cuts, a jigsaw with a fine-tooth blade works best. Routers create smoother edges.
- Sand Edges: Start with medium-grit sandpaper (120-grit), then finish with fine-grit (220-grit) for a smooth surface.
Example: A homeowner in Denver used a router to chamfer door corners, eliminating sharp edges and improving fitment by 40%. Always wear safety goggles when power-sawing-mistakes can splinter wood.
Finishing Touches Before Installation
- Patch Holes: Fill nail holes with spackle or toothpaste, then sand smooth.
- Seal Edges: Apply a clear polyurethane coat to protect against moisture.
- Test Fit: Place doors loosely in frames to check clearance gaps (¼” max).
Installing New Cabinet Doors
Alignment is critical for both appearance and function. Follow these steps:
- Hang One Door First: Secure one hinge fully, then adjust others as needed.
- Use Level: Ensure the door hangs vertically; wiggle screws slightly to fine-tune.
- Adjust Clearance: Gently push/pull doors to confirm they don’t bind.
Case Study: A family in Boston discovered uneven cabinet tops after installation, resolved by shimming behind hinges with thin cardboard. Small fixes make a big difference!
Advanced Adjustments
- Soft-Close Hinges: Install with manufacturer’s torque settings to prevent slamming.
- Custom Alignment: Use adjustable hinge pins (like Blum’s system) for micro-adjustments.
- Overlapping Doors: For multi-door cabinets, stagger hinge placements to avoid visual clutter.
Securing and Finishing Touches
Once doors hang properly, lock everything down:
- Tighten All Screws: Check hinge bolts, side brackets, and top/bottom rails.
- Apply Finish: If unpainted, seal edges with varnish or wax.
- Clean Surfaces: Wipe dust off cabinets before opening doors to avoid scratching finishes.
Statistic: The National Association of Home Builders reports that 60% of DIYers fail to tighten screws post-installation, leading to premature hinge failure. Don’t skip this step!
Testing Functionality
- Cycle Doors: Open/close repeatedly to catch binding early.
- Inspect Gaps: Use a flashlight to check for light leakage between doors.
- Check Alignment: Stand in front of cabinets; doors should appear straight from any angle.
Common Problems and Fixes
Even experts encounter hiccups. Address these issues immediately:
- Doors Stick: Loosen hinge screws slightly to allow movement.
- Gaps Too Wide: Add shims behind hinges or trim door thickness.
- Hinge Marks: Repaint or touch up with matching color.
- Noisy Operation: Apply graphite powder to hinges or lubricate with silicone spray.
Scenario 1: A homeowner in Atlanta found doors rubbing on adjacent frames, solved by repositioning hinges ½” inward.
Scenario 2: In Houston, a builder realized mismatched hinge types caused uneven alignment; switching to identical sets fixed the issue.
Related Concepts and Key Terms
Understanding related terms ensures confident decision-making throughout your project:
- Cabinet Frame:The structural skeleton supporting doors and drawers; often made of plywood or metal.
- Hinge Type:European (hidden) hinges save space; butt hinges are simpler but visible.
- Overhang:A decorative extension of cabinet fronts above or below the wall; affects door sizing.
- Shim:A thin spacer used to align components; typically made of cardboard or plastic.
- Toe Kick:The horizontal space between the floor and cabinet base; influences door clearance.
- Overlay Style:Full overlay hides the frame; inset doors reveal the frame’s design.
- Jamb:The vertical part of the cabinet frame where hinges attach.
- Pull-Out Shelf:A storage solution installed within doors; increases accessibility.
- Spindle:The vertical rod in sliding doors; must align with hinges for stability.
- Back Panel:A thin board behind cabinets; affects door depth calculations.
- Drawer Slides:Hardware allowing drawer movement; some integrate with door mechanisms.
- Kickplate:A protective strip at the bottom of cabinets; impacts door installation height.
Choosing the Right Replacement Cabinet Doors
- Matching Material and Finish:Select doors that match your existing cabinets’ material (wood, MDF, laminate) and finish (paint, stain, veneer). Test samples under different lighting to ensure consistency.
- Style Compatibility:Ensure the door style (Shaker, flat-panel, raised-panel) aligns with your kitchen’s aesthetic. Measure and compare profiles of current doors for uniformity.
- Hardware Coordination:Verify hinge compatibility (e.g., European vs. butt hinges) and adjust hole spacing if needed. Use a template tool for precise drilling.
- Durability Considerations:For high-traffic areas, opt for thicker materials (e.g., 1/2″ MDF) or reinforced edges. Laminate doors resist scratches better than painted wood.
- Eco-Friendly Options:Bamboo or reclaimed wood are sustainable choices, while low-VOC paints reduce indoor air pollution.
Measuring for Accurate Replacement
- Height and Width:Measure each cabinet front twice-from top to bottom and left to right. Account for overhang by adding/subtracting as specified in manufacturer guidelines.
- Thickness:Check the back panel depth (typically ¼”) to avoid misalignment when attaching hinges. Record the door thickness separately.
- Hinge Placement:Note the number and spacing of hinge screws on original doors. Most cabinets use 3-4 hinges spaced evenly along the edge.
- Special Cases:For sliding or pivoting doors, measure the spindle track width and clearance around moving parts.
| Measurement Type | Tool Required | Common Error |
|---|---|---|
| Width | Steel tape measure | Failing to account for overhang |
| Height | Digital caliper (for precision) | Ignoring toe kick clearance |
| Hinge Spacing | Pencil & ruler | Inconsistent screw holes |
Tools and Materials Checklist
- Essential Tools:
- Circular saw or jigsaw (for trimming oversized panels)
- Drill/driver with clutch setting (to prevent over-tightening)
- Clamps (to secure panels during sanding/gluing)
- Square (for verifying 90-degree angles)
- Adhesives and Fasteners:
- Construction adhesive (for laminates)
- Screws (1¼” long for standard cabinets; longer for deep drawers)
- Wood glue (if using solid wood)
- Finishing Supplies:
- Sandpaper (80-220 grit for progressive smoothing)
- Paint primer and topcoat (if repainting)
- Veneer sealant (for natural wood finishes)
Preparing Existing Cabinets
Remove old doors by unscrewing hinges. Inspect cabinet interiors for:
- Dry rot or loose joints (fill gaps with caulk or splines)
- Worn drawer slides (replace with new hardware before installing doors)
- Misaligned jambs (shim or level as needed)
Clean surfaces thoroughly with degreaser to remove residue from old finishes. Let dry completely before proceeding.
Advanced Installation Techniques
Adjustable Hinge Systems
European-style hinges often allow fine-tuning via knobs:
- Loosen the hinge clamp screw slightly.
- Slide the door forward/backward for alignment.
- Re-tighten and test opening/closing motion.
For uneven cabinets, use shims behind hinges until doors hang squarely.
Custom Overlay Solutions
To create full-overlay effects on inset cabinets:
- Add a uniform border strip (½” wide) around replacement doors.
- Use profile trim to blend edges into cabinet frames.
- Apply paint or laminate to the strip for seamless integration.
This technique hides frame lines while maintaining structural integrity.
Integrated Storage Upgrades
Combine door replacement with functional enhancements:
- Pull-out shelves:Install rails within cabinet depths (measure from hinge line).
- Lazy Susans:Mount in corner cabinets for circular access.
- Soft-close mechanisms:Add hydraulic dampers to hinges for smooth operation.
Material Selection & Finishing Techniques
Choosing the Right Cabinet Door Material
The material you select impacts durability, aesthetics, and maintenance:
| Material | Best For | Maintenance | Cost Range |
|---|---|---|---|
| Plywood with laminate | High-traffic kitchens | Wipe clean; avoid abrasive cleaners | $40-$120 per door |
| Solid wood (oak, maple) | Elegant finishes | Regular conditioning to prevent drying | $80-$300+ per door |
| MDF with veneer | Laser-cut designs | Seal edges to prevent moisture damage | $50-$150 per door |
Matching Existing Cabinet Finishes
- Color Matching: Take multiple samples from existing doors under natural light.
- Texture Coordination: Ensure grain direction or brushed metal finishes align.
- Edge Profiles: Match beveled, rounded, or square edges for continuity.
Use a spectrophotometer tool for precise color analysis if needed.
Special Considerations for Unique Cabinets
Sliding Pocket Doors
When replacing sliding cabinet doors:
- Measure track width precisely; doors must slide smoothly without binding.
- Add a ¼” gap between door and frame on all sides for expansion.
- Test-fit hinges after applying finish to account for shrinkage.
Tall/Deep Cabinets
- Use reinforced corner brackets to prevent sagging over time.
- Install pull handles centered along the top ⅓ of the door for ergonomic access.
- Consider adding LED lighting strips inside for visibility in lower cabinets.
Stained Glass or Decorative Panels
For custom panels:
- Frame glass with silicone adhesive for waterproof sealing.
- Use tempered glass in high-traffic areas for safety compliance.
- Ensure hinge placement doesn’t obstruct decorative elements.
Professional vs. DIY Trade-offs
When to Hire a Pro
- Custom millwork requiring CNC machining.
- Replacing hidden structural components (e.g., dowel joints).
- Complex cabinetry with integrated appliances (refrigerator drawers).
DIY Success Factors
- Invest in precision tools (e.g., digital angle finder, laser level).
- Order extra doors (5-10%) for mistakes.
- Sand surfaces thoroughly before staining or laminating.
Cost Breakdown: DIY vs. Professional
| Category | DIY Estimate (per door) | Professional Install (per door) |
|---|---|---|
| Materials | $15-$60 (stock doors, hinges, handles) | $40-$120 (custom fabrication) |
| Labor | $0-$50 (self-installed) | $75-$200 (licensed carpenter) |
| Time Commitment | 8-16 hours (including drying/finishing) | 2-4 hours (professional team) |
Common DIY Mistakes to Avoid
- Hinge alignment errors: Use a template for consistent placement on all doors.
- Inadequate sealant gaps: Leave ¼” between cabinet and wall to prevent moisture damage.
- Poor finish prep: Degrease surfaces with mineral spirits before staining to ensure adhesion.
- Over-tightening screws: Stripped cabinetry holes require epoxy filler or dowels.
Specialty Door Materials & Techniques
Laminate Doors
- Use high-quality melamine laminate for durability (e.g., Formica).
- Apply edge banding with a heat gun for seamless joins.
- Mask edges during sanding to protect laminate from scratches.
Reclaimed Wood
- Source salvaged wood from barns or antique stores for rustic aesthetics.
- Stabilize warped boards with polyurethane resin.
- Dark stains enhance contrast against lighter cabinet frames.
Frosted or Textured Glass
For privacy without losing light:
- Etch glass with diamond pads for a frosted effect.
- Use UV-resistant film for temporary texturing.
- Add anti-reflective coating if facing south-facing windows.
Accessibility Considerations
ADA-Compliant Adjustments
- Install 36″ minimum clearance between countertop and lower cabinets.
- Use soft-close hinges for heavy doors to reduce slamming.
- Opt for pull-out shelves in deep cabinets (24″+ depth).
Universal Design Tips
- Contrast colors between doors and frames for low-vision users.
- Label drawers with braille or tactile markers.
- Ensure handle height aligns with wheelchair reach zones (30-48″ off floor).
Ergonomic Handle Placement
- Standard handles should be installed at 48-52″ height for average adults, but adjust based on user needs.
- Vertical pulls (instead of knobs) improve accessibility for arthritis sufferers and children.
- Test handle reach with a tape measure from the floor to the center point of the pull.
Cabinet Door Hardware
Hinge Selection Guide
| Type | Best For | Installation Note |
|---|---|---|
| Pocket Hinges | Full-extension drawers or sliding panels | Requires precise drilling for track alignment |
| European Soft-Close | High-end kitchens with frequent use | Needs counterbored holes for proper mounting |
| Lever-Discontinued Hinges | Replacement for older cabinets | Verify screw pattern matches existing hardware |
Magnetic Closures
-
- Use thin steel plates (1/8″) inside cabinet doors for magnetic strips.
- Install adhesive-backed strips on adjacent cabinet frames.
- Adjust tension by adding washers under the door for a snug fit.
Structural Reinforcement
Door Stabilization Techniques
-
-
- Add a diagonal brace inside heavy wood doors to prevent warping.
- Use aluminum L-brackets behind glass doors to support weight.
- For over-sized panels (>16″), reinforce with hidden steel channels.
-
Frame Alignment Fixes
Misaligned frames can cause uneven door gaps:
-
-
- Shim gaps with ¼” thick oak blocks between frame studs.
- Reinforce with corner braces if using pre-fabricated frames.
- Check plumb level before final sanding with a bubble level.
-
Energy-Efficient Solutions
Thermal Insulation
-
-
- Apply closed-cell foam tape along interior door edges.
- Use double-glazed glass inserts in exterior-facing cabinets.
- Paint metal frames with high-IR-reflective paint (e.g., Sherwin-Williams Ultra Spec).
-
Low-Light Optimization
-
-
- Install dimmable LED strips (under 900 lumens) inside cabinetry.
- Use matte black finishes on interior surfaces to reduce glare.
- Coordinate cabinet colors with room’s color temperature (warm for dining areas).
-
Frequently Asked Questions
Question: How long does replacing cabinet doors take?
Answer: Average projects take 4-8 hours depending on cabinet count and complexity. Removing old doors takes ~1 hour; installing new ones takes ~2 hours per 12 doors.
Question: Can I install doors without removing old hinges?
Answer: Yes, if hinges are compatible. Simply unclip existing pins, insert new hinge pins, and test alignment. Avoid forcing mismatched parts.
Question: What’s the best way to handle doors with glass inserts?
Answer: Secure glass in slots using tempered glass clips or adhesive strips. Ensure hinges distribute weight evenly across the door’s center.
Question: Do I need special tools for frameless cabinet doors?
Answer: Frameless doors often require a laser level or bubble level for precision. Some kits include alignment guides to simplify installation.
Question: How do I choose between pre-fab and custom doors?
Answer: Pre-fab doors cost less ($20-$80 each) and ship quickly. Custom doors ($150-$300 each) offer exact sizing and unique designs, ideal for irregular spaces.
Final Thoughts
You now know how to replace kitchen cabinet doors from start to finish-from measuring and selecting finishes to troubleshooting common pitfalls. This project transforms your kitchen affordably, whether you’re updating a dated look or fixing broken hardware. Remember: patience prevents mistakes, and small adjustments ensure perfection. Happy renovating!